check out the new store http://stores.ebay.com/45buckkie
Check out what’s new
Get an extra 20% off with any purchase by typing halloweensale. http://whats-up-cooks.mybigcommerce.com/
Waterless Cooking Is The Way To Go
Traditionally, most cooking has been done in water. Unfortunately, cooking in water often takes out many of the nutrients, as well as the flavor of the food. A method to avoid losing the natural nutrition of the food is to cook it in a near-waterless environment, using the food’s natural juices.
Advantages of Waterless Cooking
The waterless cooking method has a number of advantages over conventional cooking. First of all, consider the issues that people have when considering cooking food:
Ease of cooking
Amount of time cooking takes
How difficult it is to clean the cookware
Amount of fat and oil in the food
Taste of the food
Amount of nutrition left in the food
A surprising feature of waterless cooking is that it satisfies all the above criteria that a person would require in cooking. Cooking is easy and seems to take less time than conventional cooking. Since the heat is evenly distributed, there is no burning or sticking, making the pots easier to clean. You also don’t have to use oil to prevent sticking. Since the food cooks in its natural juices, it tastes terrific and has more vitamins left in it.
The principles of waterless cooking are relatively simple and straightforward.
Many people use aluminum cookware because it heats faster, but there have been studies indicating that some aluminum gets into the food, and it may not be good for your health. A solution is to use stainless steel cookware.
Waterless cookware is made of high grade stainless steel, which does not allow tastes from the metal to leach into the food. Stainless steel is also easier to clean and does not require such coatings as Teflon, which also may get into the food.
The bottom of the cookware is machined flat, so that as much surface as possible is in contact with the coils of an electric stove. The surface is also machined for better efficiency when using a gas stove. An aluminum or copper plate distributes the heat evenly along the bottom of the pot or pan. This eliminates hot spots that can burn the food. It also provides heat to the bottom in all directions.
The lid forms a seal with the pot, locking in the natural moisture that escapes from the food during the heating process. Foods can cook in their own natural juices, so that vitamins and minerals are retained.
Since vegetables contain a large quantity of water, there is no need to add any when cooking. Water that is released from the vegetables upon cooking turns into steam and is contained in the pot by the lid. The steam helps the cooking process. Once the natural juices create sufficient steam, a whistle or steam valve notifies the cook. At that time the cook can turn off the heat. This saves energy, and the food cooks at a constant temperature, because of the pot’s heat retention capabilities and the heat of the steam inside the pot.
Once the cookware gets hot, it retains its heat. The shiny surface of the stainless steel does not radiate much energy, and the iron core or plate maintains the temperature for continuous, constant temperature cooking with the heat turned off. The result of these features is that the food cooks quicker, at lower temperatures, and in their own juices. It is tastier and better for you.
How to use your waterless cookware
Rinse Prepared Fruits and Vegetables: Rinsing in cold water and then draining is important for 2 reasons; removing harmful chemicals and allowing enough water to cling to the food to combine with natural juices and cook the food in its own steam. This is waterless, nutritional cooking. Add 1/4 inch of water to provide enough steam to cook your vegetables and to activate the steam control valve.
Control the Heat: Always control the heat throughout the cooking process. If you have heat that is too high it evaporates the steam and your food burns. With waterless cookware the control is never on higher than medium heat.
Get a Vapor Seal: Start the cooking process on medium heat until the steam control valve whistles in the open position. Then turn heat down to low or simmer and close the valve. After you do this the lid will form an airtight heat seal. Note: if steam is escaping around the lid, reduce heat to a lower setting. Solid foods, such as potatoes and carrots, take about five minutes before the steam control valve whistles. More watery type foods, such as apples or cabbage, take about three minutes.
Don’t Peek: Resist that urge to peek. When the cover is removed while cooking, heat and steam are allowed to escape. This lengthens the cooking time and dries out the food.
Vacuum Release in Knob: If the lid becomes locked on when the food is done, simply open valve to release the vacuum and remove lid.
Special Advantages
The covers are specially designed to form a natural water-seal with the shoulder of the pan when cooking on low heat. This is the secret of successfully cooking the minimum moisture way. This self-sealing feature helps to retain the food moisture with its valuable minerals and delicious flavors.
Cooking is done with economical low heat. Just like insulation in your house, this cookware saves a lot of money over the years on utility bills. The built-in steam control valve whistles like a tea kettle to let you know when to turn the heat down from medium to low or simmer.
With waterless cookware you will enjoy a wonderful new method of cooking. Foods cooked the modern, minimum moisture way help retain the greatest percentage of nature’s health giving minerals and vitamins. Elements which are dissolved in water are boiled away when cooked in water. The greatest favor you can do for your family is to prepare food that provides maximum nourishment. Foods cooked on low heat with minimum moisture have way more flavor. Vegetables and fruits retain appetizing colors, meats can be roasted on top of the stove and become tender, juicy and delicious. You can cook without oil or grease for lower cholesterol.
Waterless cooking is terrific. The food is tastier and better for you. If you have a chance to try some food cooked with this method, do so. It can make you look and feel better, live longer, have healthier lives and save time and money every day with equipment that quickly pays for itself and continues to produce savings every day for a lifetime. Try it for yourself at http://www.whatsupcooks.com.
Waterless Cooking Is The Way
Traditionally, most cooking has been done in water. Unfortunately, cooking in water often takes out many of the nutrients, as well as the flavor of the food. A method to avoid losing the natural nutrition of the food is to cook it in a near-waterless environment, using the food’s natural juices. Advantages of Waterless Cooking The waterless cooking method has a number of advantages over conventional cooking. First of all, consider the issues that people have when considering cooking food: Ease of cooking Amount of time cooking takes How difficult it is to clean the cookware Amount of fat and oil in the food Taste of the food Amount of nutrition left in the food A surprising feature of waterless cooking is that it satisfies all the above criteria that a person would require in cooking. Cooking is easy and seems to take less time than conventional cooking. Since the heat is evenly distributed, there is no burning or sticking, making the pots easier to clean. You also don’t have to use oil to prevent sticking. Since the food cooks in its natural juices, it tastes terrific and has more vitamins left in it. The principles of waterless cooking are relatively simple and straightforward. Many people use aluminum cookware because it heats faster, but there have been studies indicating that some aluminum gets into the food, and it may not be good for your health. A solution is to use stainless steel cookware. Waterless cookware is made of high grade stainless steel, which does not allow tastes from the metal to leach into the food. Stainless steel is also easier to clean and does not require such coatings as Teflon, which also may get into the food. The bottom of the cookware is machined flat, so that as much surface as possible is in contact with the coils of an electric stove. The surface is also machined for better efficiency when using a gas stove. An aluminum or copper plate distributes the heat evenly along the bottom of the pot or pan. This eliminates hot spots that can burn the food. It also provides heat to the bottom in all directions. The lid forms a seal with the pot, locking in the natural moisture that escapes from the food during the heating process. Foods can cook in their own natural juices, so that vitamins and minerals are retained. Since vegetables contain a large quantity of water, there is no need to add any when cooking. Water that is released from the vegetables upon cooking turns into steam and is contained in the pot by the lid. The steam helps the cooking process. Once the natural juices create sufficient steam, a whistle or steam valve notifies the cook. At that time the cook can turn off the heat. This saves energy, and the food cooks at a constant temperature, because of the pot’s heat retention capabilities and the heat of the steam inside the pot. Once the cookware gets hot, it retains its heat. The shiny surface of the stainless steel does not radiate much energy, and the iron core or plate maintains the temperature for continuous, constant temperature cooking with the heat turned off. The result of these features is that the food cooks quicker, at lower temperatures, and in their own juices. It is tastier and better for you. How to use your waterless cookware Rinse Prepared Fruits and Vegetables: Rinsing in cold water and then draining is important for 2 reasons; removing harmful chemicals and allowing enough water to cling to the food to combine with natural juices and cook the food in its own steam. This is waterless, nutritional cooking. Add 1/4 inch of water to provide enough steam to cook your vegetables and to activate the steam control valve. Control the Heat: Always control the heat throughout the cooking process. If you have heat that is too high it evaporates the steam and your food burns. With waterless cookware the control is never on higher than medium heat. Get a Vapor Seal: Start the cooking process on medium heat until the steam control valve whistles in the open position. Then turn heat down to low or simmer and close the valve. After you do this the lid will form an airtight heat seal. Note: if steam is escaping around the lid, reduce heat to a lower setting. Solid foods, such as potatoes and carrots, take about five minutes before the steam control valve whistles. More watery type foods, such as apples or cabbage, take about three minutes. Don’t Peek: Resist that urge to peek. When the cover is removed while cooking, heat and steam are allowed to escape. This lengthens the cooking time and dries out the food. Vacuum Release in Knob: If the lid becomes locked on when the food is done, simply open valve to release the vacuum and remove lid. Special Advantages The covers are specially designed to form a natural water-seal with the shoulder of the pan when cooking on low heat. This is the secret of successfully cooking the minimum moisture way. This self-sealing feature helps to retain the food moisture with its valuable minerals and delicious flavors. Cooking is done with economical low heat. Just like insulation in your house, this cookware saves a lot of money over the years on utility bills. The built-in steam control valve whistles like a tea kettle to let you know when to turn the heat down from medium to low or simmer. With waterless cookware you will enjoy a wonderful new method of cooking. Foods cooked the modern, minimum moisture way help retain the greatest percentage of nature’s health giving minerals and vitamins. Elements which are dissolved in water are boiled away when cooked in water. The greatest favor you can do for your family is to prepare food that provides maximum nourishment. Foods cooked on low heat with minimum moisture have way more flavor. Vegetables and fruits retain appetizing colors, meats can be roasted on top of the stove and become tender, juicy and delicious. You can cook without oil or grease for lower cholesterol. Waterless cooking is terrific. The food is tastier and better for you. If you have a chance to try some food cooked with this method, do so. It can make you look and feel better, live longer, have healthier lives and save time and money every day with equipment that quickly pays for itself and continues to produce savings every day for a lifetime. Try it for yourself at http://www.whatsupcooks.com.
LaCrisine 18pc Microwave Cookware Set
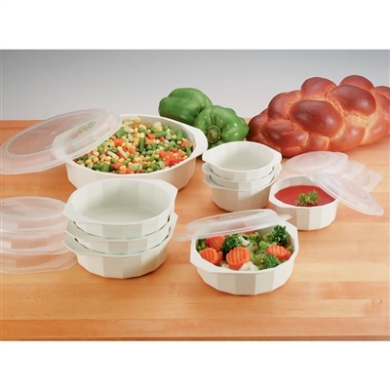
was $38.95
Now $19.95
Great for microwave cooking. What a great way to store and reheat your leftovers as well.
Wow Them With A Chocolate Fountain
Chocolate fountains are one of the most requested features for wedding parties and other special events.
You’re having a party! Maybe it’s a Sweet Sixteen, or a wedding reception, or a family reunion. You’ll need to feed people of course, and during the discussions, someone suggests that you have a chocolate fountain. Now, there’s something to think about. After all, they look impressive, and well, it’s chocolate! Do you need any other reason to have one at your gathering?
A chocolate fountain is a mechanical fountain (like a water fountain) that allows melted chocolate to cascade down in a controlled manner over metal tiers (as a rule, larger chocolate fountains can support a greater number of tiers). This produces a showy “waterfall” effect, and better still, you and your guests get to eat the “waterfall” by dipping edibles into the chocolate stream. A chocolate fountain contains a heating element internally to keep the melted chocolate at a good “flow” temperature. Like a waterfall, the melted chocolate begins its journey in a bottom reservoir; it’s lifted internally up to the fountain top by a pump or auger mechanism. Once the melted chocolate flows down over the tiers, it returns to the bottom reservoir and starts the process all over again.
The chocolate fountain, when operating, looks like a three-tiered chocolate wedding cake (and it smells wonderful!!). The warm chocolate fondue cascades over the tiers creating a chocolate “waterfall” in which delicious treats like strawberries & marshmallows can be dipped.
Chocolate fountains are in big demand at:
Weddings
Engagement parties
Rehearsal dinners
Bar Mitzvahs
Birthday celebrations
Anniversary parties
Bridal & baby showers
Dinner parties
Dessert buffets
Grand openings
Trade shows
Open houses
Graduation parties
Holiday celebrations
Children’s parties
and many other various functions!!
In fact, the chocolate fountain can be used at just about any event where you are looking to amaze guests, attract attention, or make a truly memorable impression.
There are many ways in which to display the chocolate fountain. Many people prefer the “look” of the fountain without draping material around it as a cover up. However, this is a common practice and looks very nice. The dipping items can also be presented to dramatically enhance the whole presentation. Here are a few options.
1. Tiers & Tablecloths: Arm yourself with two large tablecloths. The first is laid directly on the table. Put the fountain base on this foundation. Then create steps starting from the back of the fountain around each side to the front. The steps may be built with anything from boxes, in various sizes, to blocks of any type purchased at craft stores (or even telephone books!). The steps should be highest in the back gradually sloping down to the front. Dipping items in front of the fountain may be placed directly on the table surface. Once the steps have been situated, take the second tablecloth and cover the steps, creating a draping, flowing look. (The second cloth may be the same or a complimentary color.) Cloth napkins of another color may be used (again, the color is up to you or your client) and swirl them in the mix with the tablecloth. You will find these can be easily replaced throughout the course of the event in order to keep chocolate soiled linens to a minimum.
2. Twinkling white lights and Glass Blocks: We have many creative customers who use these tools. They simply set up the fountain on a tablecloth, keeping it loose to create folds. Then square glass blocks (purchased from home improvement stores) are placed in strategic places around the fountain. Twinkle lights are now entwined in the folds of the tablecloth. The dipping items, pre-arranged on ceramic or silver platters, are set on top of the glass blocks. Often times dipping items are put into glass bowls and placed on top of the silver trays. This arrangement is stunning, sparkly and beautiful!
3. Don’t Forget the Flowers: Flowers, fruit, foliage and assorted greenery are always a grand and gorgeous addition to the fountain table. Simple arrangements set on the table make a nice addition, as do greens weaved through the cloth with the twinkle lights. Display pre-skewered dipping items in decorated flowerpots and/or vases (lined with florist foam – to hold up the skewers). Arrange skewers in pots with dipping items up so they look like flowers on a stem (works well with marshmallows and cut strawberries!).
4. Use more than one chocolate fountain for a display the will be truly unforgettable!! Love the option of having multiple fountains with a different fondue in each one (imagine…milk chocolate in one, white in one and caramel in the other – WOW!!).
What about the chocolate?
Every manufacturer of chocolate fountains all warn of the same thing: do not expect that you can just pick up supermarket chocolate to use in your fountain! There are chocolates specially formulated for fountains, and those are recommended by some manufacturers; others insist you can use any good couverture (always follow instructions for the specific chocolate fountain you buy or rent). Couvertures (and chocolates specially formulated for fountains) differ from most other chocolate. Part of the difference is that they contain a greater percentage of fat, which may be cocoa butter or vegetable oil. That’s important, because chocolate, even melted, is too thick to work well in a fountain. Extra cocoa butter or vegetable oil thins the chocolate enough so it can be drawn up the internal chamber and cascade properly over the tiers. However, in my opinion, vegetable oil lowers the quality of the chocolate. Were I using a chocolate fountain for any purpose, I would try my best to use a chocolate with extra cocoa butter. You can melt your chocolate in the fountain if you wish, but it will probably take longer than you like; most sources advise melting the chocolate (in a microwave or double boiler) before putting it into the fountain.
If you’re wondering what to dip into your cascading melted chocolate, think about foods that pair well with chocolate fondue: marshmallows, all of the traditional fruits – apple slices, banana chunks, strawberries, pineapple chunks, etc., dried fruits, potato chips, Rice Krispie squares, caramels, cream puffs, grapes, small squares of fudge, orange segments, well, you get the idea, you can serve pretty much anything you’d like with it! You might also try cookies, graham cracker sections, pound cake cubes, or pretzels, but you need to be careful about crumbs. Crumbs or small bits of food can clog your chocolate fountain, so that the chocolate doesn’t flow properly. You can always provide small cups, which your guests can fill from the fountain, then dip any crumbly items into the cup.
Also fun is to have a set up of toppings. Little bowls of finely chopped nuts, coconut, smashed up candy canes, sprinkles, etc. It’s a fun little “extra” to have on hand. Try dipping a chunk of banana in chocolate, then in some coconut or peanuts! Yum!
Consider semi-sweet and milk chocolate, rich Belgian chocolate and chocolate creations featuring specialty flavors and colors.
Water is chocolate’s enemy. Be very careful to use a dry bowl, dry utensils, and to not allow any water to fall into your chocolate. Even a tiny drop of water causes melted chocolate to “seize”. For this reason, you should never use a lid when melting chocolate (condensation will occur, and drip in!), and you should always be careful when using a double boiler.
Liquid added to chocolate must be warm. Pretty basic rule – cold liquid added to melted chocolate will cause it to seize. Warm liquid will not – this is why it’s important to heat up the cream mixture before adding it to the chocolate.
Make a lasting impression on any occasion with a Chocolate Fondue Fountain! Your fountain can become the highlight of your celebration, and you’ll make sure your memories of that day are sweet ones.
Did you know that chocolate fountains can be used for more than just chocolate? How about a cascade of warm, melted caramel? For a savory twist, try a smooth salad dressing in your fountain, served with raw veggies. Chic, delicious, and it might even be cool enough to get the kids in the group to eat their vegetables! As a bonus, you’ll get some nutrition and fiber along with your calories. Try one out with your next party and watch the fun begin. http://www.whatsupcooks.com
Dehydrating Is An Ancient Technique
Drying foods is an ancient and simple technique. Before canning and refrigeration, it was an important way to preserve food, removing enough moisture to prevent decay and spoiling.
A food dehydrator is a small electrical appliance for drying foods indoors. A food dehydrator has an electric element for heat and a fan and vents for air circulation. Dehydrators are efficiently designed to dry foods fast at 140ºF. Dehydrators contain several stacked trays; heated air flows through all the layers and dries food evenly. An adjustable thermostat controls the temperature, and you can dehydrate slices of fruit, vegetables, herbs, or even meat to make jerky.
Costs vary depending on features; some models are expandable and additional trays can be purchased later. Twelve square feet of drying space dries about a half-bushel of produce. The major disadvantage of a dehydrator is its limited capacity.
Dehydrating takes a fraction of the storage space, weighs less, saves money, requires no refrigeration and can last for years (when stored properly and kept in a cool dry place, dehydrated foods can last up to 30 years depending upon the item).
Dehydration can either be an alternative to canning or freezing, or complement these methods. Drying foods is simple, safe and easy to learn. With modern food dehydrators, fruit leathers, banana chips and beef jerky can all be dried year round at home. Learning how to dehydrate food is simple, safe and easy. Drying food is also a great way to eat healthy and to save on your overall food costs.
How Dehydrating Preserves Food:
Drying removes the moisture from the food so bacteria, yeast and mold cannot grow and spoil the food. Drying also slows down the action of enzymes (naturally occurring substances which cause foods to ripen), but does not inactivate them.
You can be more confident that your food is safe – since it is dried, the botulism spores are inactive – if it is spoiled, it obviously looks and smells spoiled.
In drying, warm temperatures cause the moisture to evaporate. Low humidity allows moisture to move quickly from the food to the air. Air current speeds up drying by moving the surrounding moist air away from the food.
Because drying removes moisture, the food becomes smaller and lighter in weight. When the food is ready for use, the water is added back, and the food returns to its original shape.
Dehydrator Features to Look For:
Enclosed heating elements.
An enclosed thermostat from 85ºF to 160ºF.
Fan or blower.
Four to ten open mesh trays made of sturdy, lightweight plastic for easy washing.
UL seal of approval.
A one-year guarantee.
A dial for regulating temperature.
A timer. Often the completed drying time may occur during the night and a timer could turn the dehydrator off and prevent scorching.
How To Dehydrate Food in 10 Simple Steps:
1. Read the owner’s manual. (It’s amazing how many people DON’T do this when they purchase a product)
2. Start with fresh fruits and vegetables of the very best quality. Over-ripe, bruised and otherwise deteriorated produce will not yield good results when dehydrated.
3. Clean, hull and slice all fruits and vegetables, taking care to maintain consistency in the thickness of the slices. (This will ensure that everything dries at an even rate.)
4. If desired, treat apples, pears and other fruits prone to oxidation with citrus juice or ascorbic acid. This will help to retain the color of the fruit before, during and after the drying process.
5. Blanch broccoli, cauliflower, celery, carrots, corn, peas and potatoes to speed drying time and to help maintain color. Three to five minutes in boiling water should be adequate. Blanching is a necessary step in preparing vegetables for drying. By definition, blanching is the process of heating vegetables to a temperature high enough to destroy enzymes present in tissue. Blanching stops the enzyme action which could cause loss of color and flavor during drying and storage. It also shortens the drying and rehydration time by relaxing the tissue walls so moisture can escape and later re enter more rapidly. Vegetables can be water blanched or steam blanched.
6. Optional: Add salt, sugar or spices to flavor.
7. Load your fruit and vegetable slices onto the dehydrator trays, being careful not to overlap them, as this will slow the drying time.
8. Turn your dehydrator on immediately after loading to start the dehydration process. Consult your owner’s manual for recommended drying times, but expect the process to take between 8-12 hours on average.
9. As you reach the end of the drying time, check your fruits and vegetables frequently for dryness. To do so, simply remove a slice from the dehydrator, allow it to cool and then feel it with your fingers. If the slice feels dry to the touch, it should be adequately dried. To further evaluate the dryness of fruit: cut several fruit slices in half, and check the cut edges for moisture beads. If any are present, the fruit is not yet dry enough, and needs to be returned to the dehydrator. It is very difficult to give an exact time frame for dehydrating foods because of all the variables. Humidity in and outside the home, thickness and type of cut, how loaded the trays are, and even different brands of produce can all affect dehydration time. Also, the type of dehydrator you use plays a large role. If the fan is on the top or bottom of your dehydrator it will take longer for the food to dry because the circulation of air flow is disrupted by the other trays. If the fan is in the back of the dehydrator (where it should be) your food will dry faster and more evenly. Foods should be dry enough to prevent microbial growth and subsequent spoilage.
Dried fruits should be leathery and pliable. To test foods for dryness, remove a few pieces and let cool to room temperature. When warm or hot, fruits seem more soft, moist and pliable than they actually are. Squeeze a handful of the fruit. If no moisture is left on the hand and pieces spring apart when released, they are dry.
Dried jerky is chewy and leathery. It will be as brittle as a green stick, but won’t snap like a dry stick. To test for dryness, remove a strip of jerky from the dehydrator. Let cool slightly, then bend the jerky; it should crack, but not break when bent. When jerky is sufficiently dry, remove the strips from the drying racks to a clean surface. Pat off any beads of oil with a paper towel and let cool.
10. Package and store your dehydrated food.
TIP: It is so much easier to cut your dehydrated foods with kitchen scissors instead of using a knife. Some of the dehydrated foods you can simply crumble in your hands.
Wash everything down with an anti-bacterial cleanser of your choice. Just like when canning foods, it is important to practice good hygiene while dehydrating as well. This ensures a good end product with a longer shelf life.
Wear latex or vinyl gloves when handling the food!
There are natural oils and moistures in your hands which will contaminate your foods by reintroducing moisture. The whole idea to dehydrating foods is to maintain a good quality food with a long shelf life. Wearing protective gloves helps you obtain these goals.
Warm up your dehydrator. Air circulation helps eliminate the growth of contaminates, therefore it is best to start the dehydrator and get the air moving before putting your food in.
Whether you’re interested in drying food for health concerns, preserving the fruits of your own harvest or store bought, don’t have the proper equipment for canning, or just enjoy dried fruits and vegetables, then dehydration is the way to go. Enjoy the possibilities of drying different fruits, vegetables and meats that will last longer than in your refrigerator. Visit www.whatsupcooks.com to get your dehydrator and start dehydrating today. Let us know how it works for you.
Chef’s Secret 15pc 12-Element T304 Stainless Steel Cookware

Was $1595.00
Now $370.95
Features extra heavy-gauge stainless steel, a Steam Control™ valve to make healthy waterless cooking easy and 12-element construction that spreads heat quickly and evenly. Set includes: 1.7qt saucepan with cover, 2.5qt saucepan with cover, 3.2qt saucepan with cover, 7.5qt roaster with cover, skillet, dome cover, mixing bowl with cover that also works as a double boiler, steamer rack, and deep fry basket with handle. Limited lifetime warranty. White box.

Chef’s Secret 28pc 12-Element T304 Stainless Steel “Waterless” Cookware
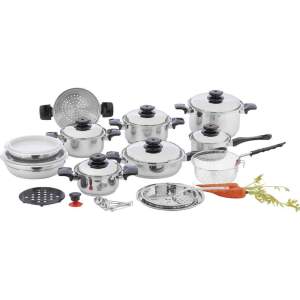
Was $641.95
Now $342.49
This elegant cookware set is a chef’s dream. The T304 stainless steel bowls can also be used as double boilers or even as dome covers for stove-top roasting. Set includes: 1.5qt saucepan with cover, 1.5qt stockpot with cover, 2qt stockpot with cover, 3qt stockpot with cover, 6qt stockpot with cover, 10-1/2″ frypan with cover and helper handle, 2 mixing bowls with polypropylene covers, steamer and frying baskets, pan-top grater with handle and adapter ring, suction knob, trivet, and 4pc measuring spoon set. Features mirror finish exterior, satin finish interior, and Steam Control™ top knobs.
Wyndham House Electric Fondue
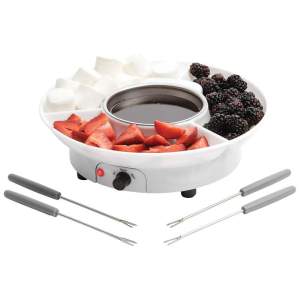
Was $52.95
Now $39.95
Features metal fondue bowl, heat control knob and 4 skewers. Measures 10-3/4″ x 3″ x 10-3/4″. Gift boxed.
